To send search console data to Econda we have to make two operations. Firstly we should get the search console data over Google API and send that data to ECONDA using the Econda API. During these operations the correct format required by the APIs should be satisfied.
Getting Search Console Data:
A. Enabling API and Creating API Credentials
By default search console API is not enabled on Google accounts. To activate the search console API following steps should be taken:
The steps of Funnel Analysis
If you don’t have a project yet, create a new project by clicking on the project drop-down menu at the top of the page and selecting “New Project”. Enter a name for your project and click “Create”.
1. Go to the Google Cloud website (https://console.cloud.google.com/).
2. If you don’t have a project yet, create a new project by clicking on the project drop-down menu at the top of the page and selecting “New Project”. Enter a name for your project and click “Create”.
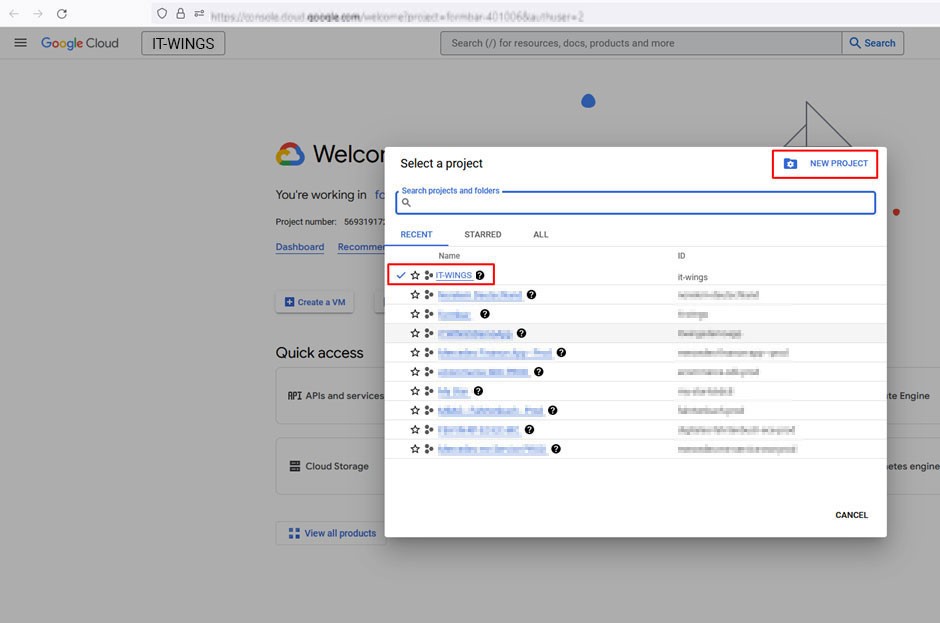
3. Once you have a project, select it from the project drop-down menu.
4. In the menu below or left sidebar, click on “APIs & Services” and then select “Library”.
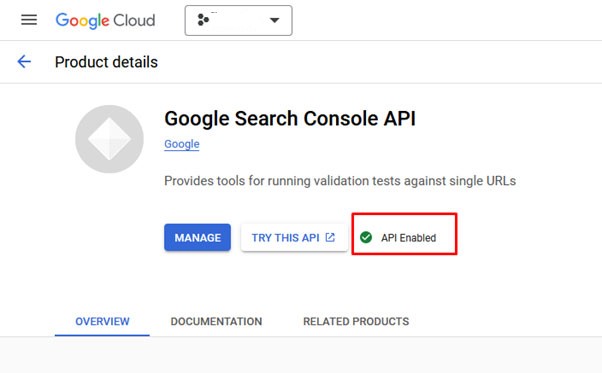
5. In the search bar, type “Search Console API” and press Enter.
6. Click on the “Search Console API” result that appears.
7. On the Search Console API page, click the “Enable” button.
8. After enabling the API, you may need to set up credentials to access the API. Click on the “Credentials” tab in the left sidebar.

9. Click on the “Create credentials” button and select “API key” . Follow the prompts to create the credentials. This tep will create a service account to access Search Console API. So if we want to create access over company email we should select “OAuth” however “OAuth” method requires verification at each time before accessing the API. If we had chosen the “OAuth” method, we would have to login our accounts with a google login popup and verify accounts each time. So “API key” method is more practical.
10. Once you have the credentials, you can use them to authenticate your requests to the Search Console API.
B. Enabling Service Account To Access Search Console
Sales Funnel in an Onlineshop
In the previous step we have enabled Search Console API and created a service account to use this API. However this is not enough to get the actual search console data of an asset. This service account acts like a normal google account but used to access API. So access permission should be given to this account under the related search console asset like a regular account. We can follow the steps below:
1. Go to the Search Console website (https://search.google.com/search-console) and log in with the account that has access to the data.
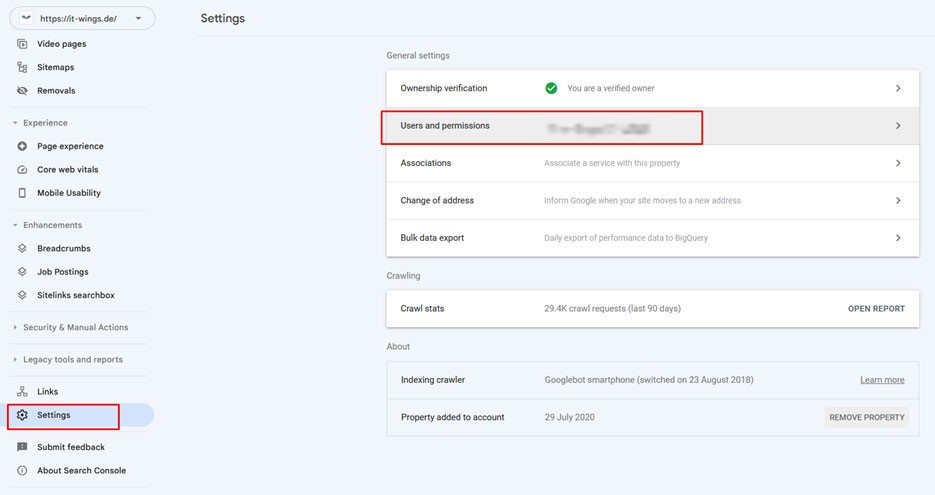
2. Click on the website property that you want to grant access to the service account.In the left sidebar, click on “Settings” and then select “Users and permissions”. Click on the “+ Add user” button.
3. In the “Add new user” dialog, enter the email address of the service account that you want to grant access to. The service account email address should be in the format:[SERVICE_ACCOUNT_NAME]@[PROJECT_ID].iam.gserviceaccount.com.
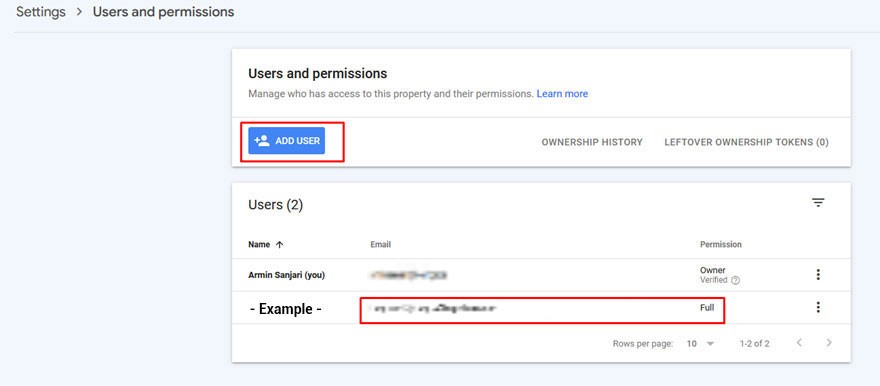
4. Select the permission level you want to grant to the service account. To give full permission, select the “Full” permission level. We click on the “Add” button to grant the permission to the service account.
C. Using The Search Console API over REST API
We can use Search console API independent of programming language. However I prefer to develop on NodeJS. There are different libraries that can be used to make access easier. I used “googleapis” library. Further information can be found here: https://github.com/googleapis/google-api-nodejs-client
Basic authentication can be accomplished by this:
					const { google } = require("googleapis");
// Authorize with the service account
const auth = new google.auth.GoogleAuth({
  credentials: key,
  scopes: ["https://www.googleapis.com/auth/webmasters"],
});
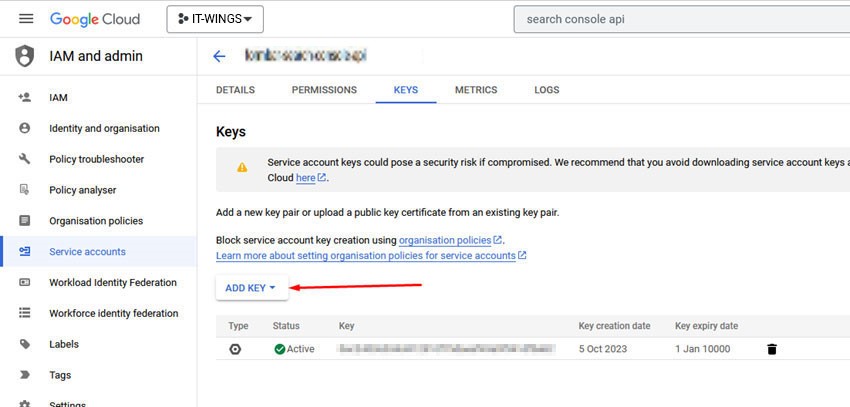
Here “key” should be the JSON file given for authentication for that service account. This JSON key file is downloaded during the key creation process for service account:
After successful verification, a query for search keywords or landing pages can be created in the following way:
					// Create a service object for the Search Console API
const searchConsole = google.webmasters({ version: "v3", auth: client });
const searchAnalyticsResultByKeyword =
  await searchConsole.searchanalytics.query({
    siteUrl: "https://it-wings.de",
    requestBody: {
      startDate: "2024-07-03",
      endDate: "2024-10-05",

      dimensions: ["query", "page"],

      rowLimit: 100, // get top 10 rows
    },
  });
C. Using The Search Console API over REST API
We can send the information via the ECONDA API to the ECONDA Reports. You can find more information about the ECONDA API here:
A post request should be sent to ECONDA using this URL:
https://www.econda-monitor.de/json/<CLIENT_KEY>
Some of the fields that should be used in the body of the request is describes in the document such as:
| Key | Value | Example | Description |
|---|---|---|---|
| rid | Request id | AYFC9uAyn5BWqhbuAkoU2*ks8*yGrmKZ | Mandatory The request ID is a unique identifier for the sent request. We recommend using UUID v4. |
| sid | Session ID | AYFC44i3V6T1Z*sPaMQyfcpPXhUbKyxz | Mandatory The session ID is a unique identifier for the user’s session. |
| vid | Visitor ID | AYFC98X_aiu8NlliQ7__QTmThvYItTdz | Mandatory The Visitor ID is a unique identifier for the user. |
| Key | Value | Example | Description |
|---|---|---|---|
| host | “HOST” | itwings.com | Mandatory Host name of the server used to access the website. (e.g. location.hostname). |
| content | “CONTENT” | start/blog | Unique identifier for the content der currenten website. By entering slashes (“/”), the web page context, i.e. the path, can also be transferred and evaluated in summarized form at a later time. |
| siteid | “SITEID” | itwings.com | Site ID, name of the website to be measured, as set up by econda support. As a rule, it is the main domain, without leading “www”. |
| countryid | “COUNTRY CODE” | DE | The Country ID allows you to distinguish your website for different countries |
| langid | “LANGID” | UAE | Use the language ID to transfer the language of the displayed page. |
| emosV | “EMOSV”, Tracking Version | json1.0 | The version of econda web tracking. |
| ip | “IP ADRESS” | 127.0.0.1 | IP address of the client. If no IP address is set, 127.0.0.1 is set as a fallback. |
| ua | “USERAGENT” | Mozilla/5.0 (X11; Ubuntu; Linux x86_64; rv:108.0) Gecko/20100101 Firefox/108.0 | User agent of the client |
An example request could then look like this:
					const data1 = {
rid: "****************************",
sid: "****************************",
source: "suma",
camp: "test_keyword6",
content: "test",
ref: "https://www.google.com",
siteid: "it.wings",
host: "it-wings.de",
emosV: "json1.0",
ip: "127.0.0.1",
dt: datetime,
prv: 3,
rolle: "not registered",};
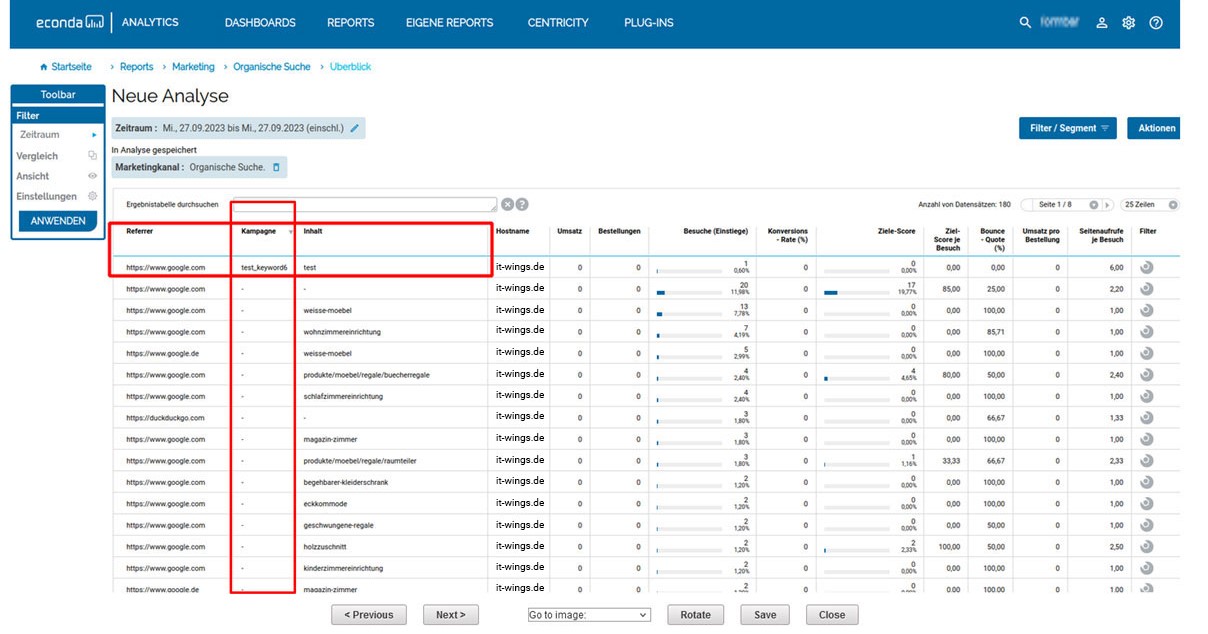
Important note: ECONDA has its own organic search reports. However, there is no special place for keywords in these reports. Therefore, we use the “Campaign” column to display the search keywords. In this report, the “Campaign” column will display the search keywords and this is set via the API.